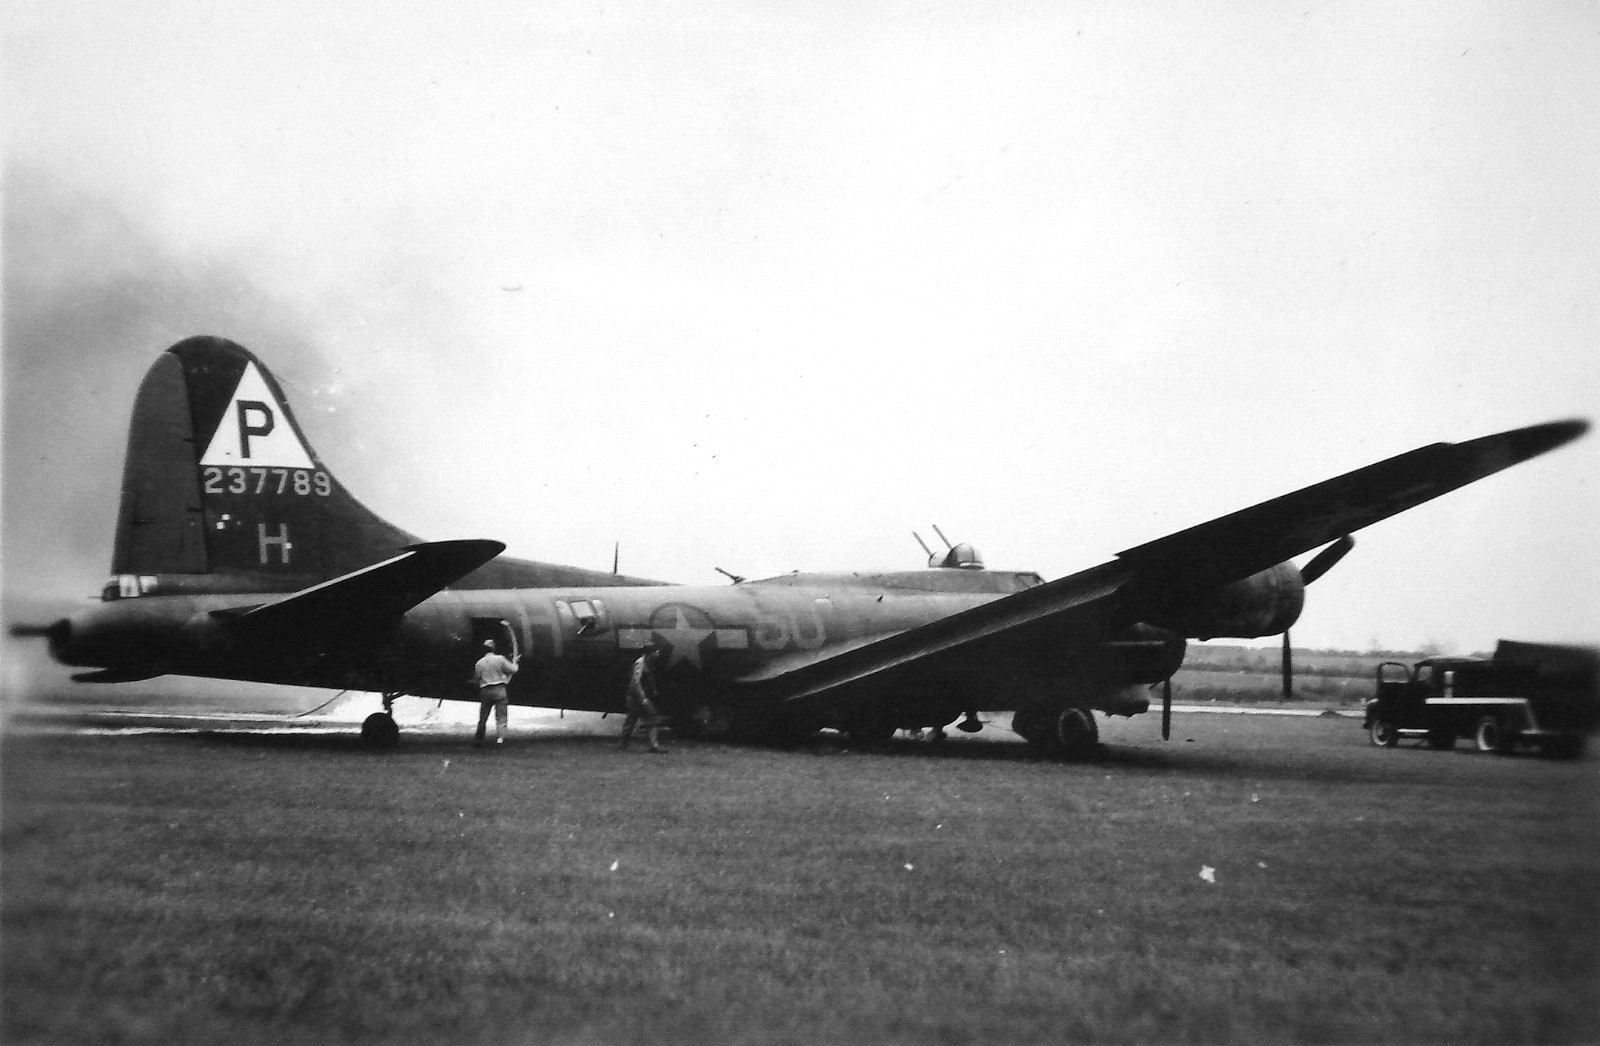
#42-37789 The Loose Goose shortly after coming to a stop. Left undercarriage can be seen to have collapsed, as yet the fire has not taken hold. Photo Tony Plowright, courtesy of www.384thbombgroup.com
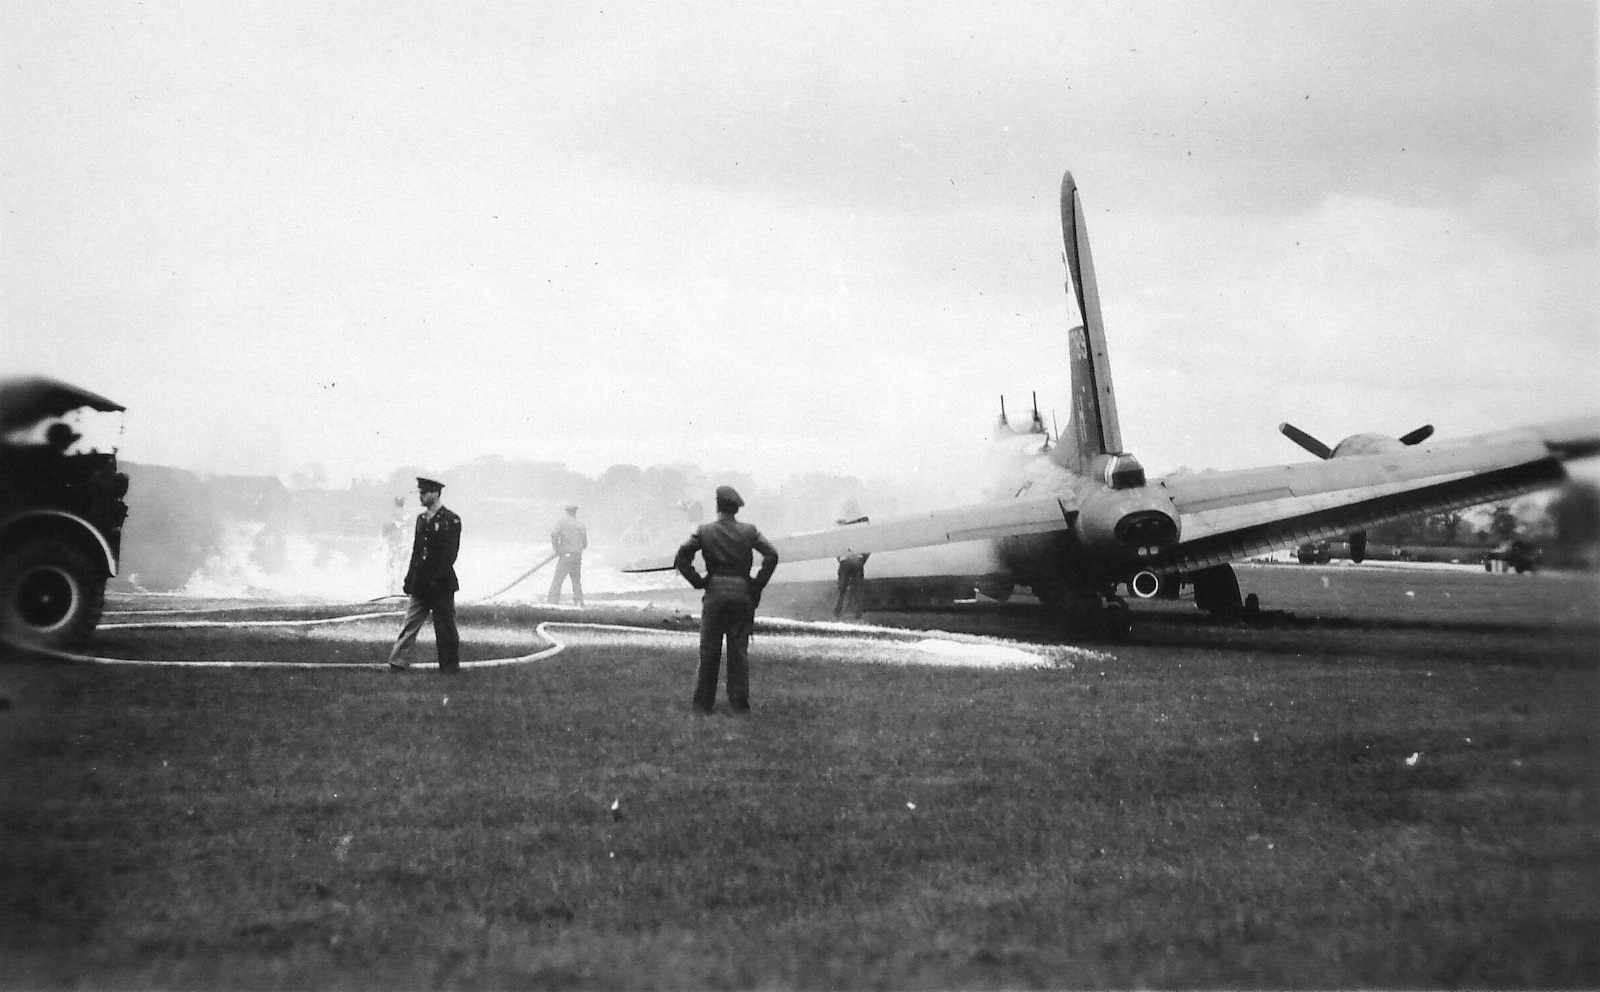
The first emergency teams have arrived and have started to fight the fire. Photo Tony Plowright, courtesy of www.384thbombgroup.com
In this image the missing section of wing can clearly be seen. Fuel has started to leak feeding an ever increasing fire. Photo courtesy of www.384thbombgroup.com
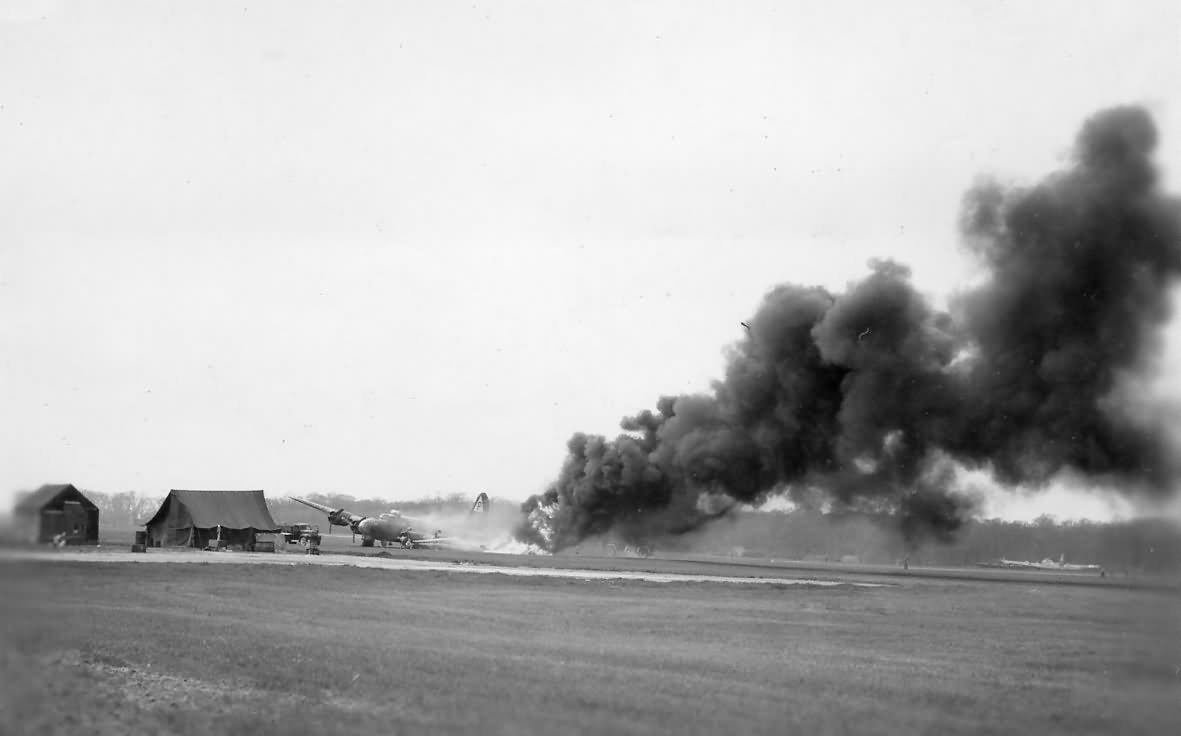
Ground crew shacks can be seen in the foreground. Photo courtesy of www.384thbombgroup.com
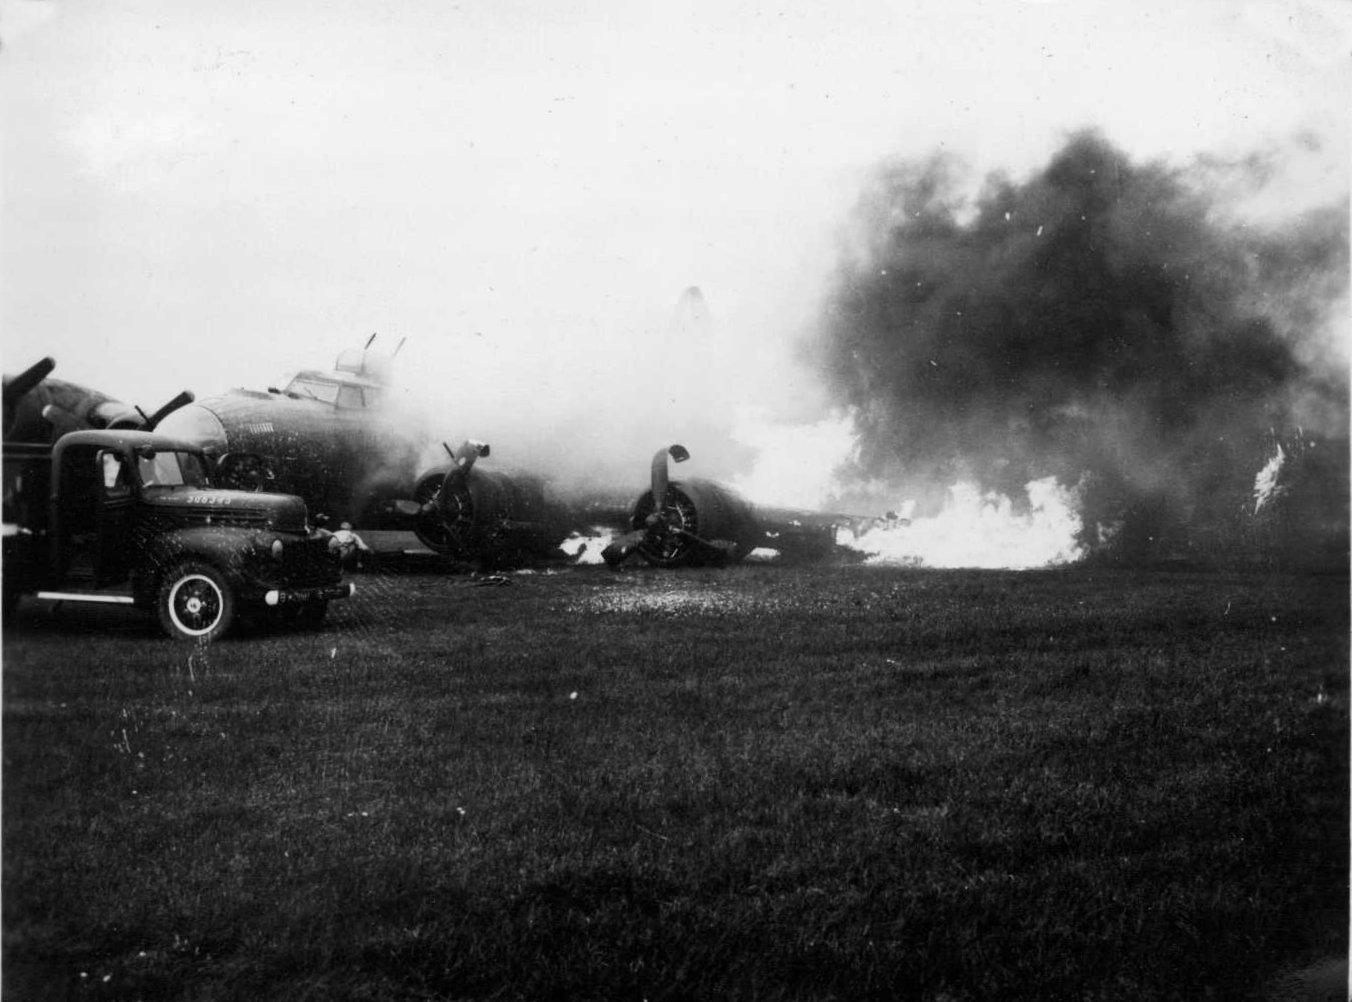
Photo courtesy of www.384thbombgroup.com
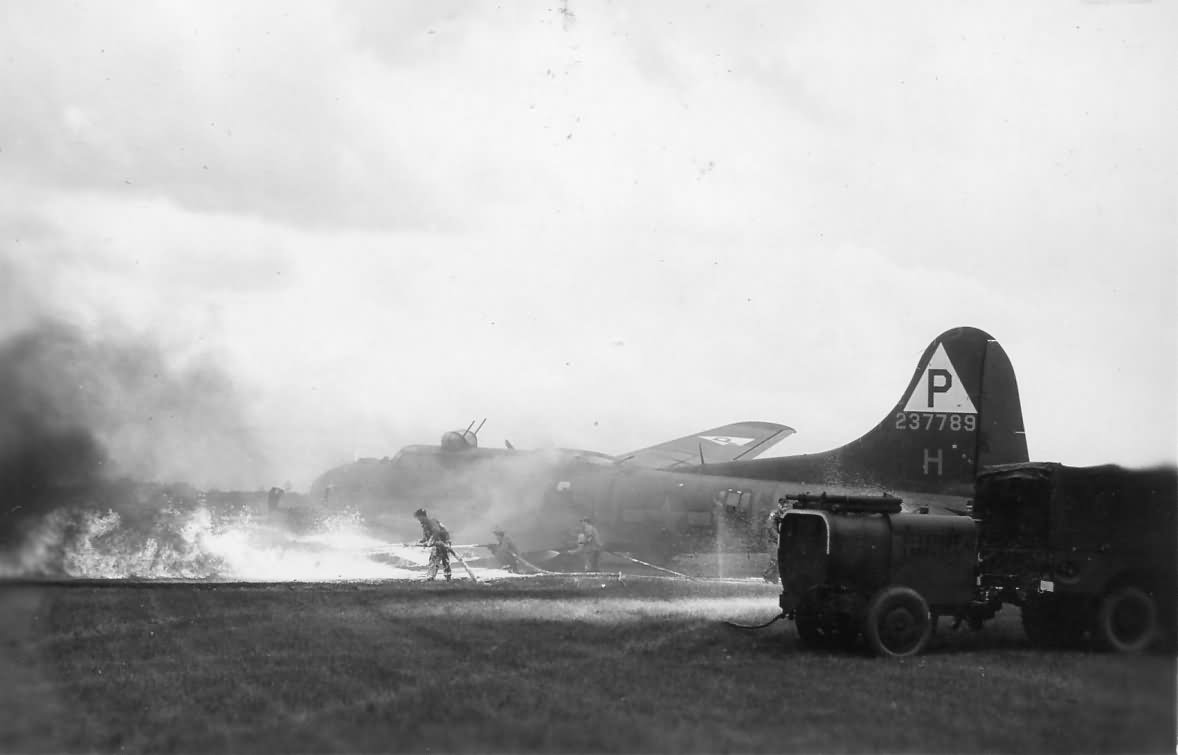
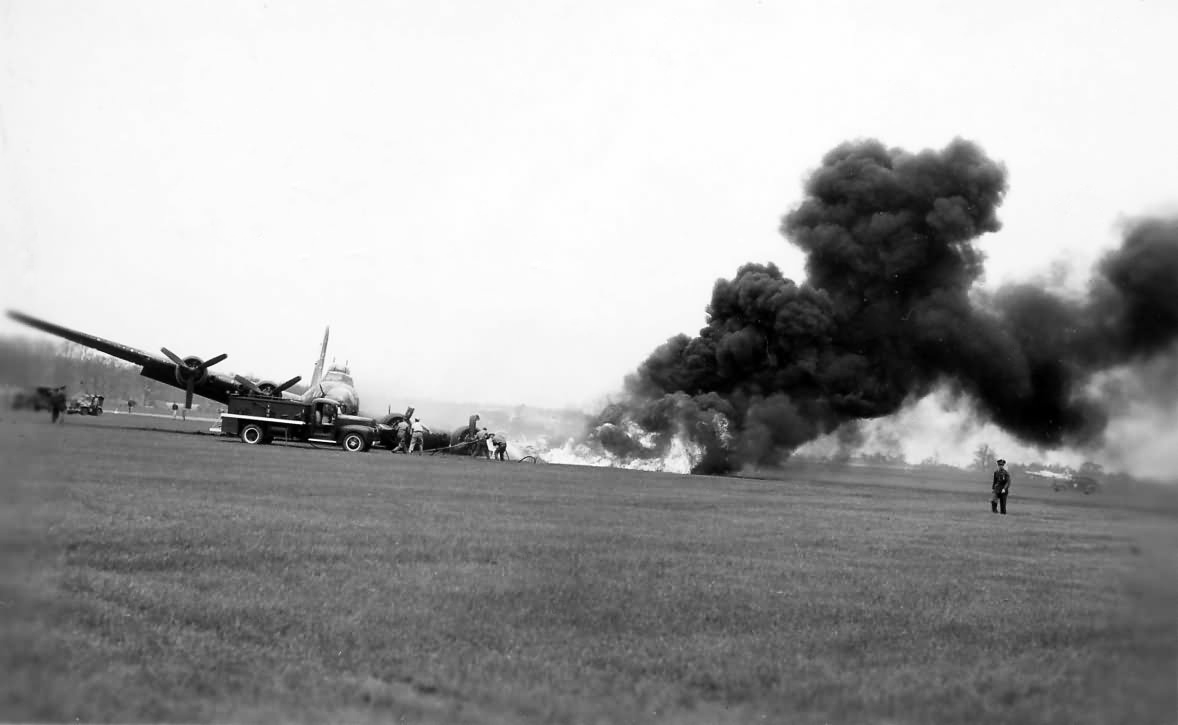
Fire has now completely engulfed the wing, with three separate hoses being employed in this image to try and fight the flames. Photo courtesy of www.384thbombgroup.com
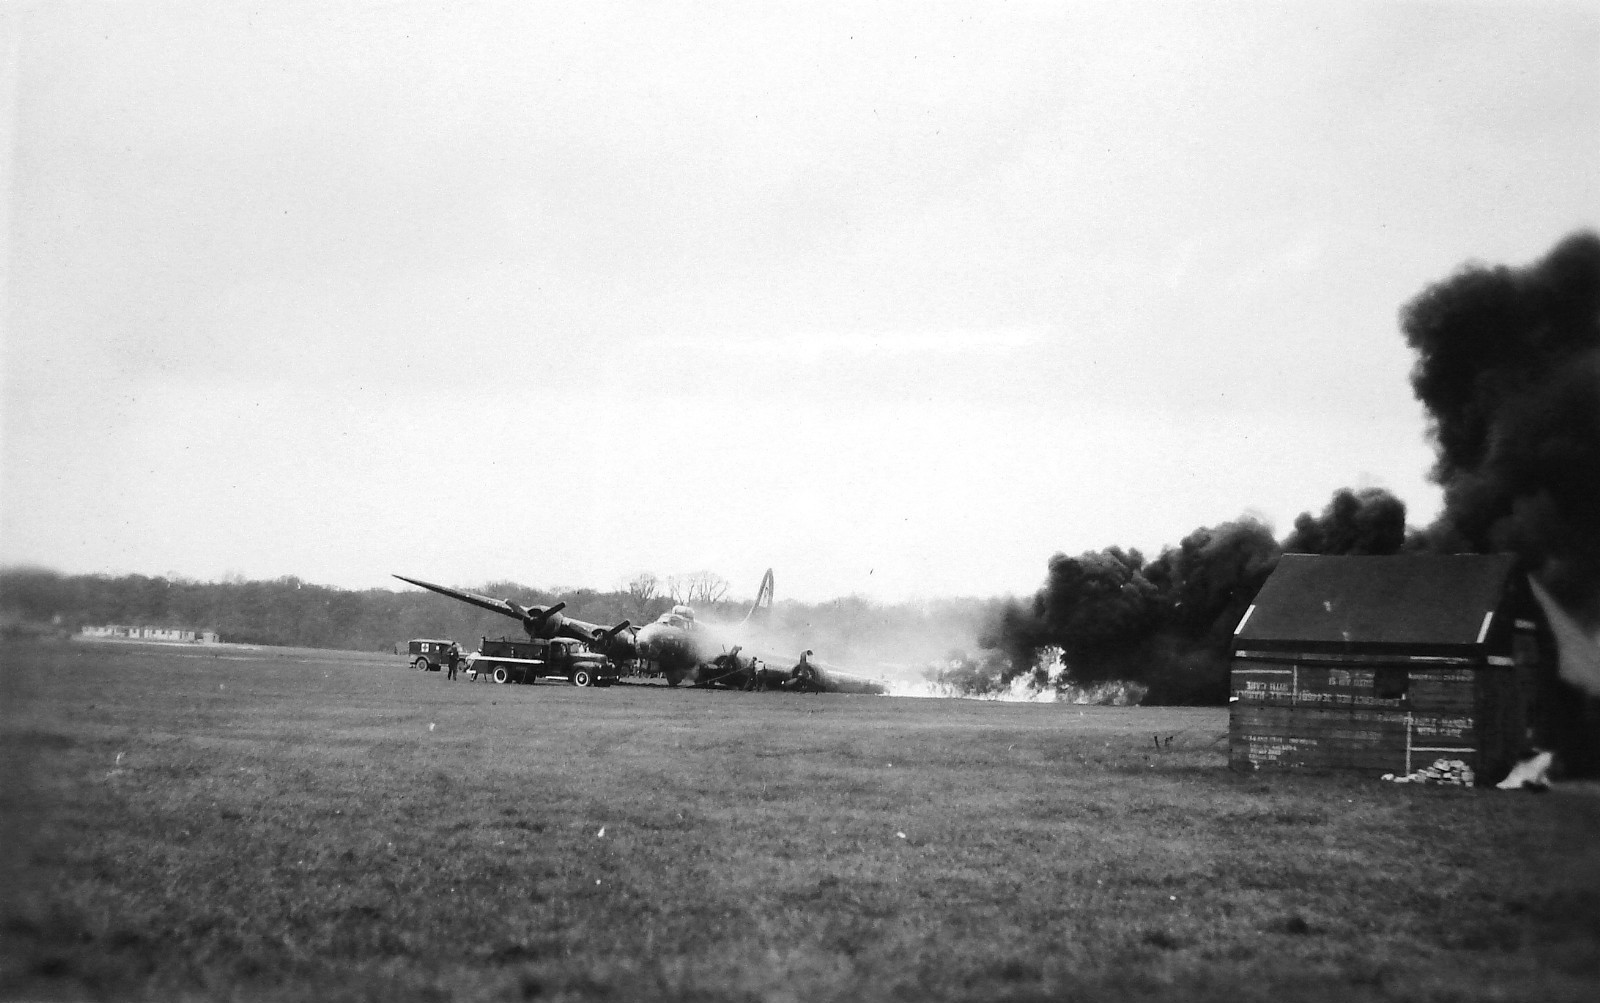
Photo Tony Plowright, courtesy of www.384thbombgroup.com
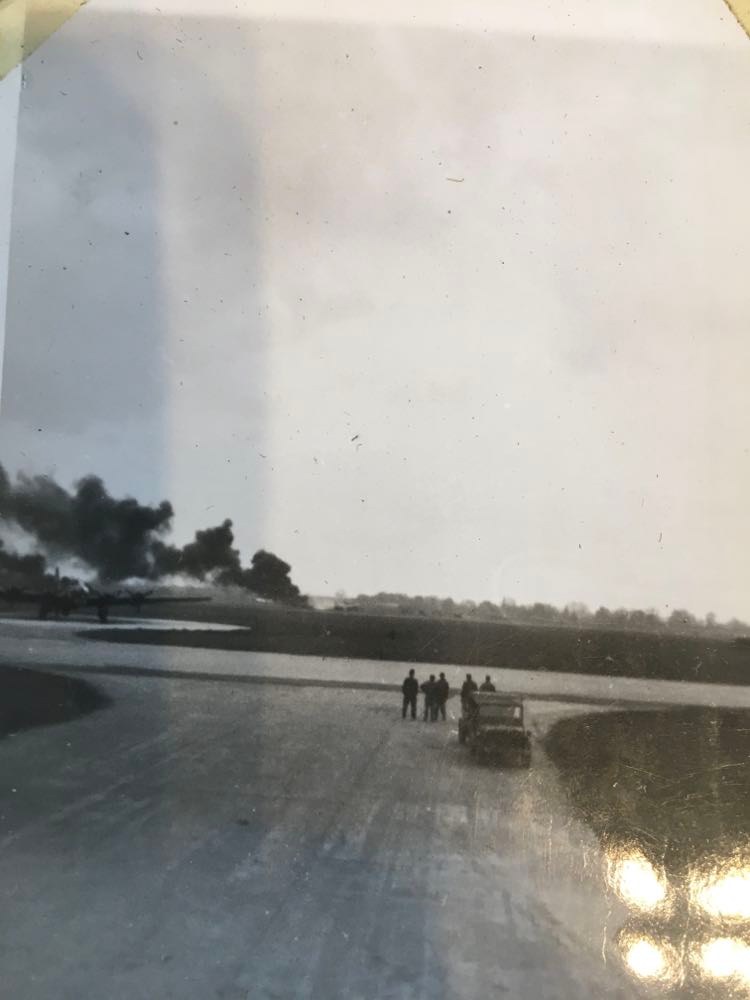
Image taken from Dispersal 13. Photo courtesy of www.384thbombgroup.com
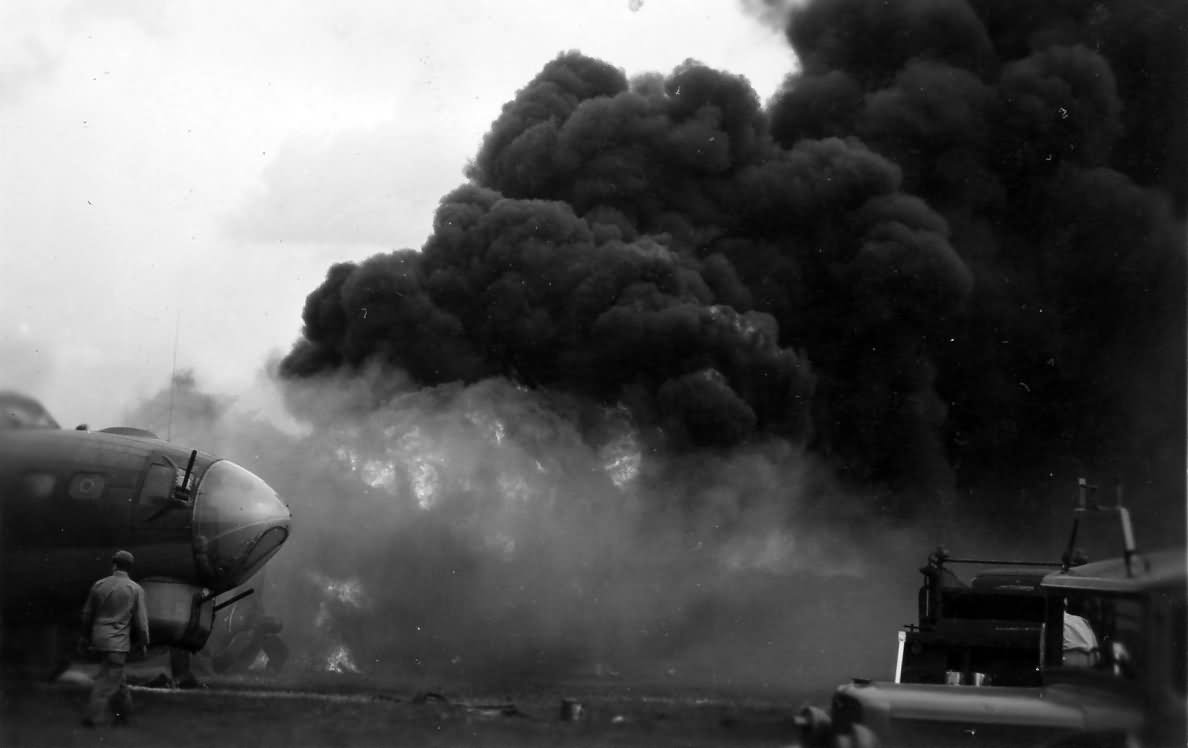
Photo Morgan Himmelstein, courtesy of www.384thbombgroup.com
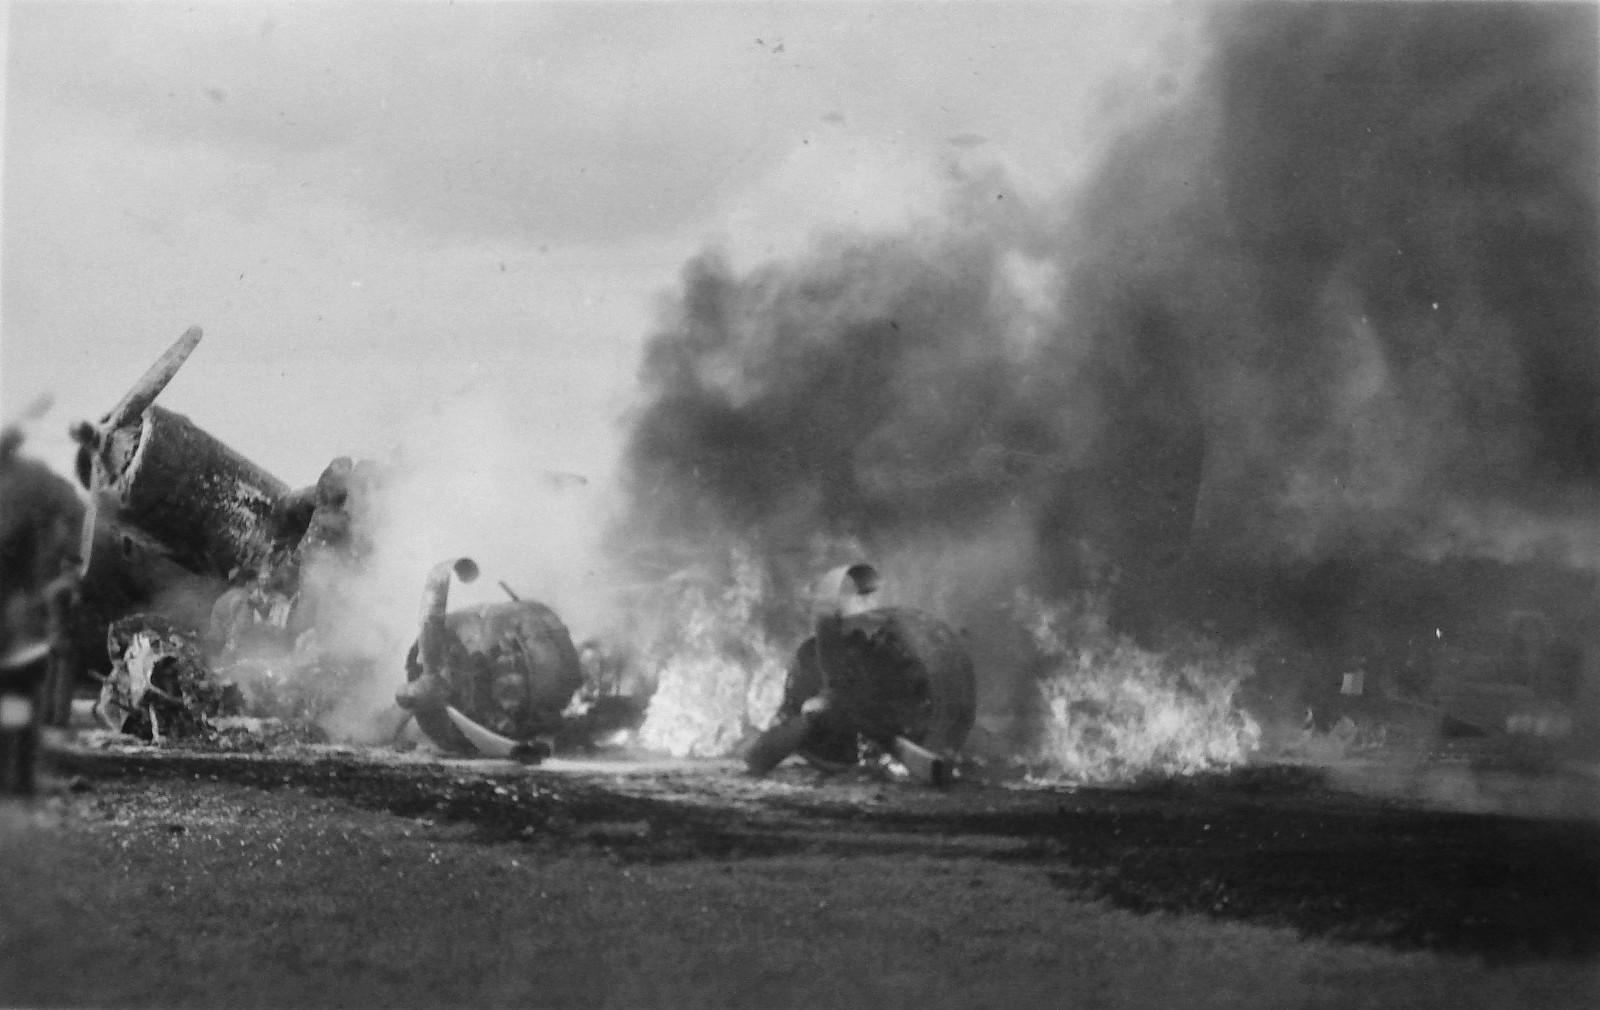
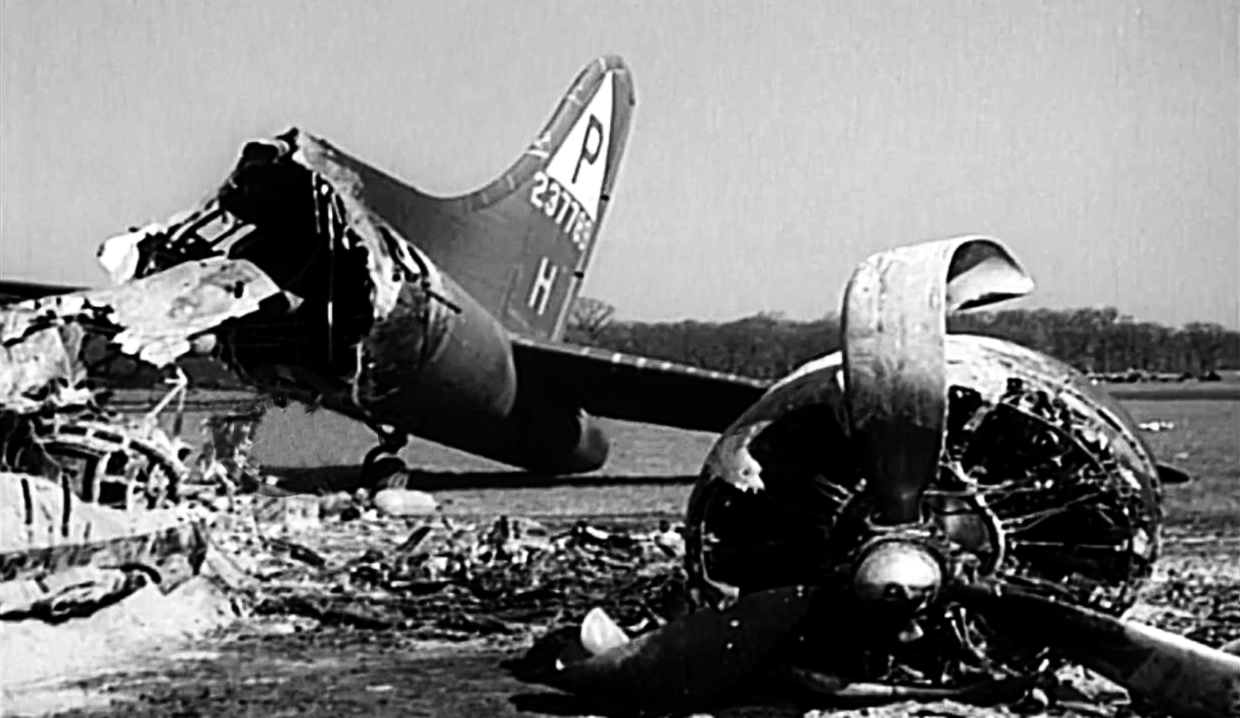
Aircraft now nearly totally destroyed, with engines #3 & #4 visible pointing upwards, showing the destruction of the fuselage. Photo Tony Plowright, courtesy of www.384thbombgroup.com
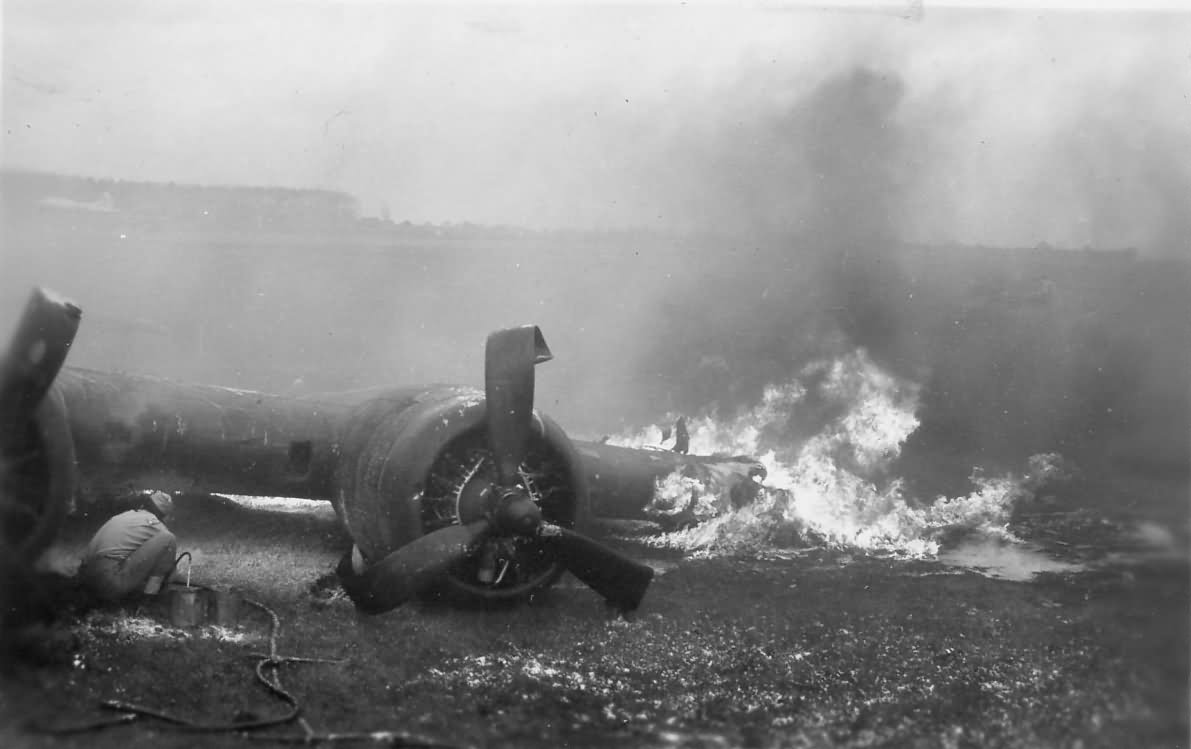
Photo courtesy of www.384thbombgroup.com
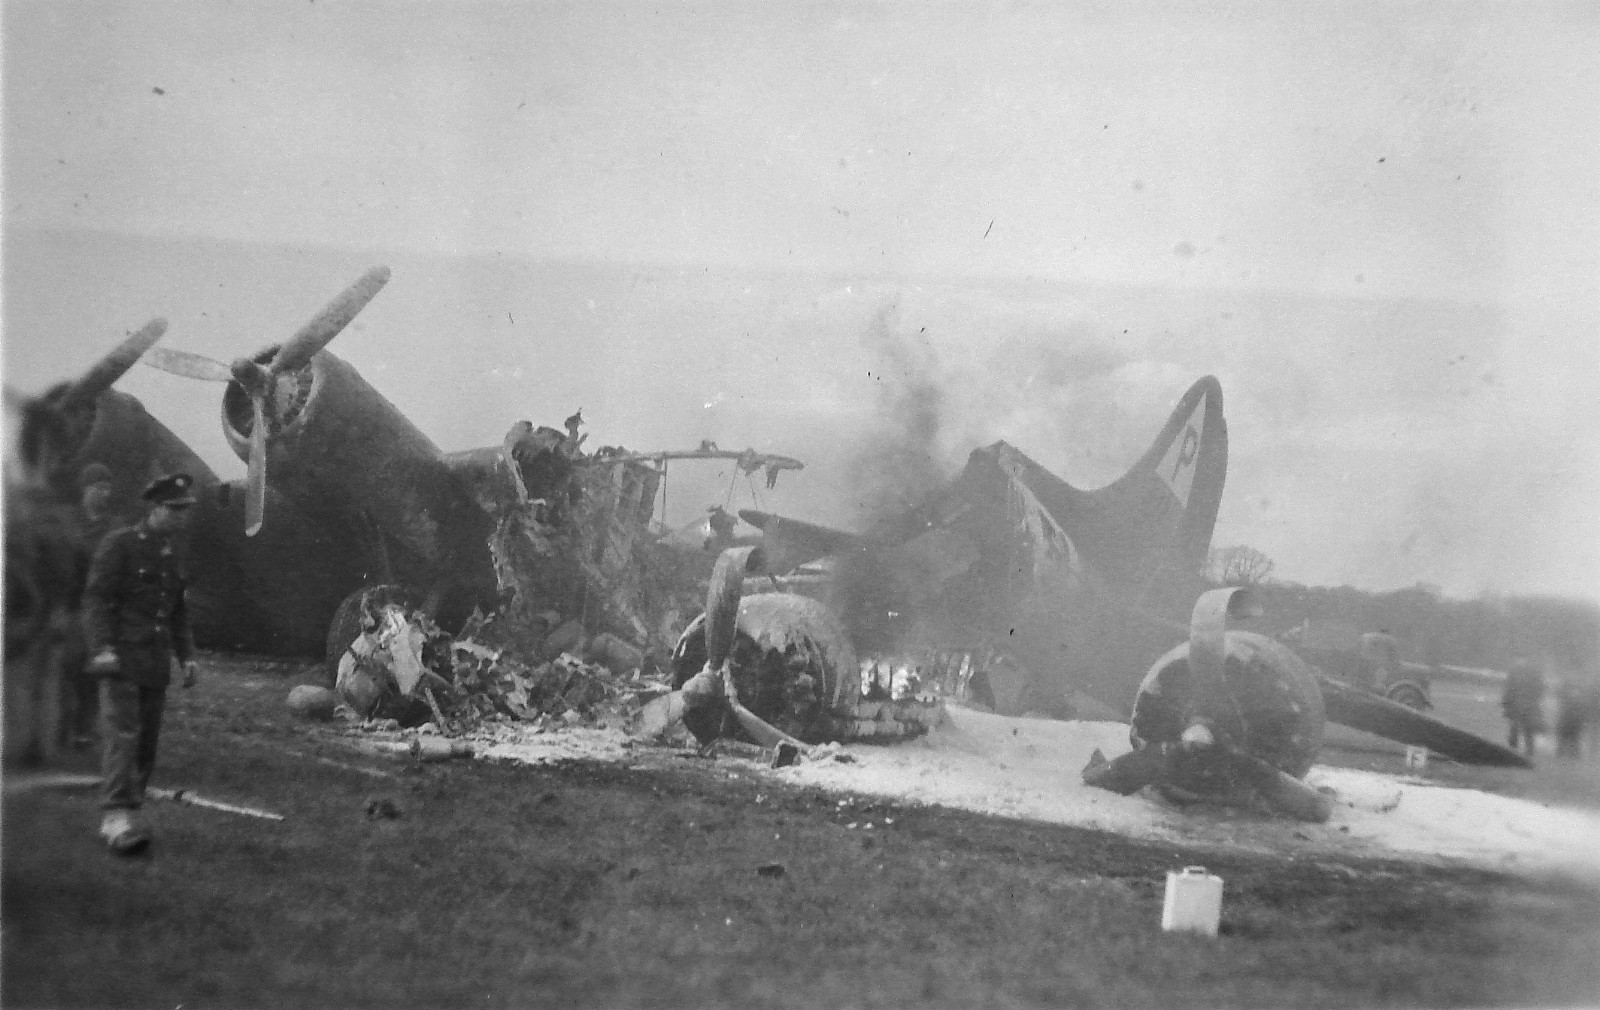
Fire now extinguished, showing clearly the destruction caused by the fire. Photo Tony Plowright, courtesy of www.384thbombgroup.com
A still taken from a video reel shot at the time of the accident. Photo courtesy of www.384thbombgroup.com
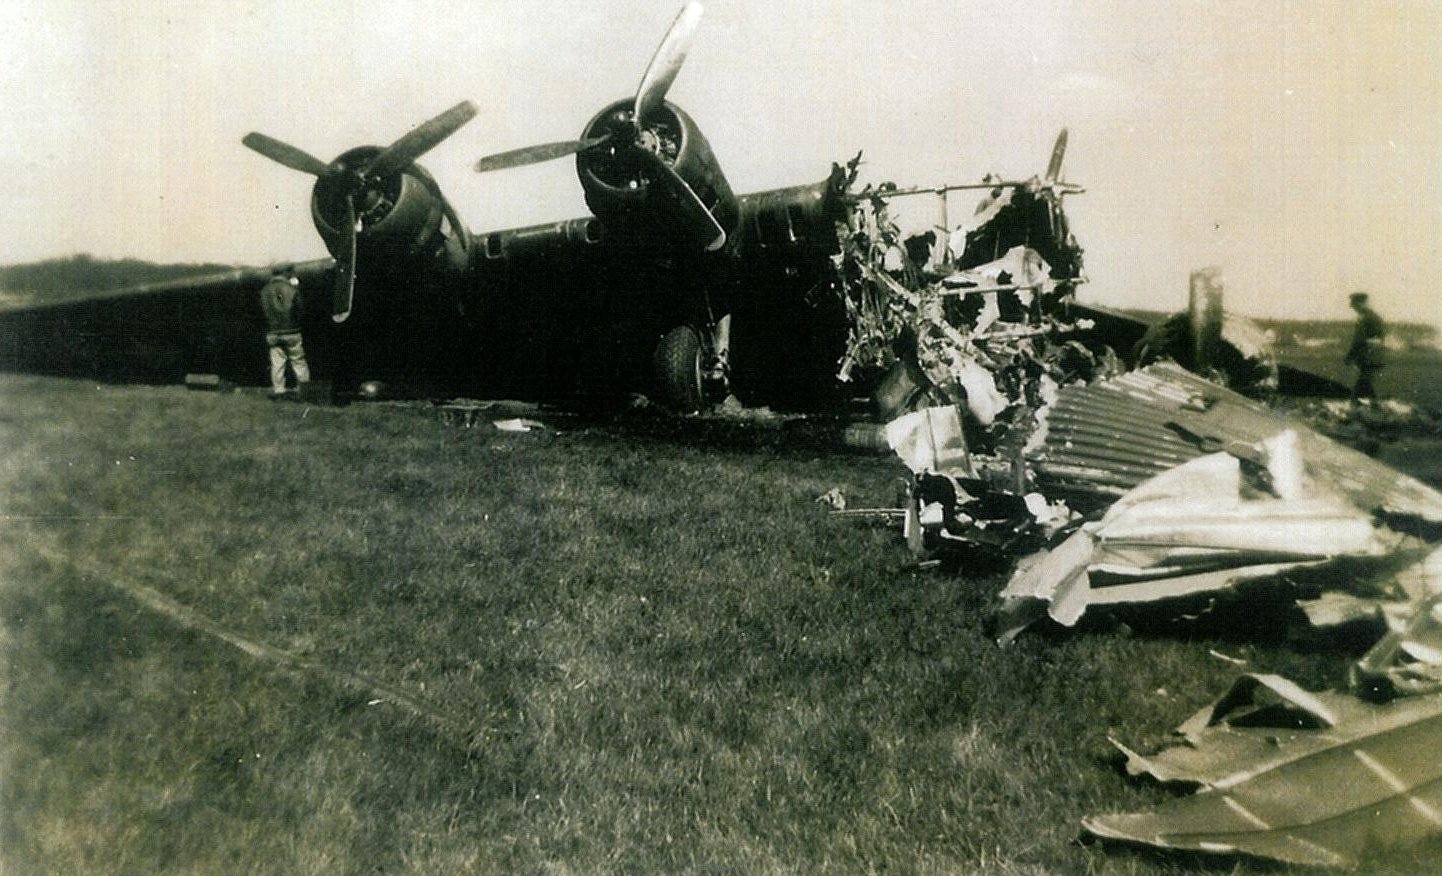
Photo courtesy of www.384thbombgroup.com
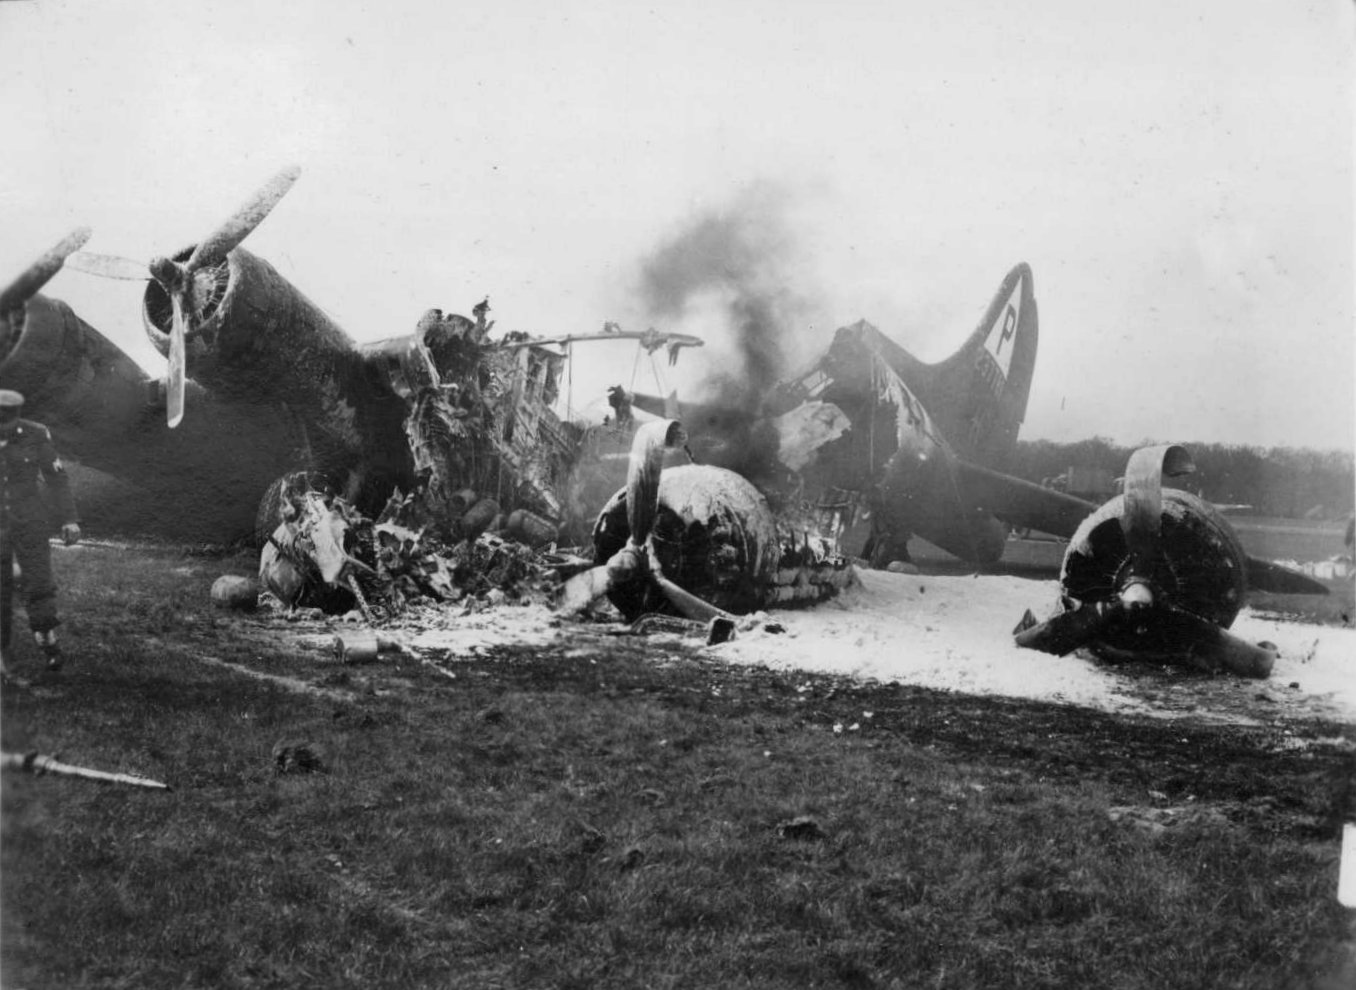
Photo courtesy of www.384thbombgroup.com
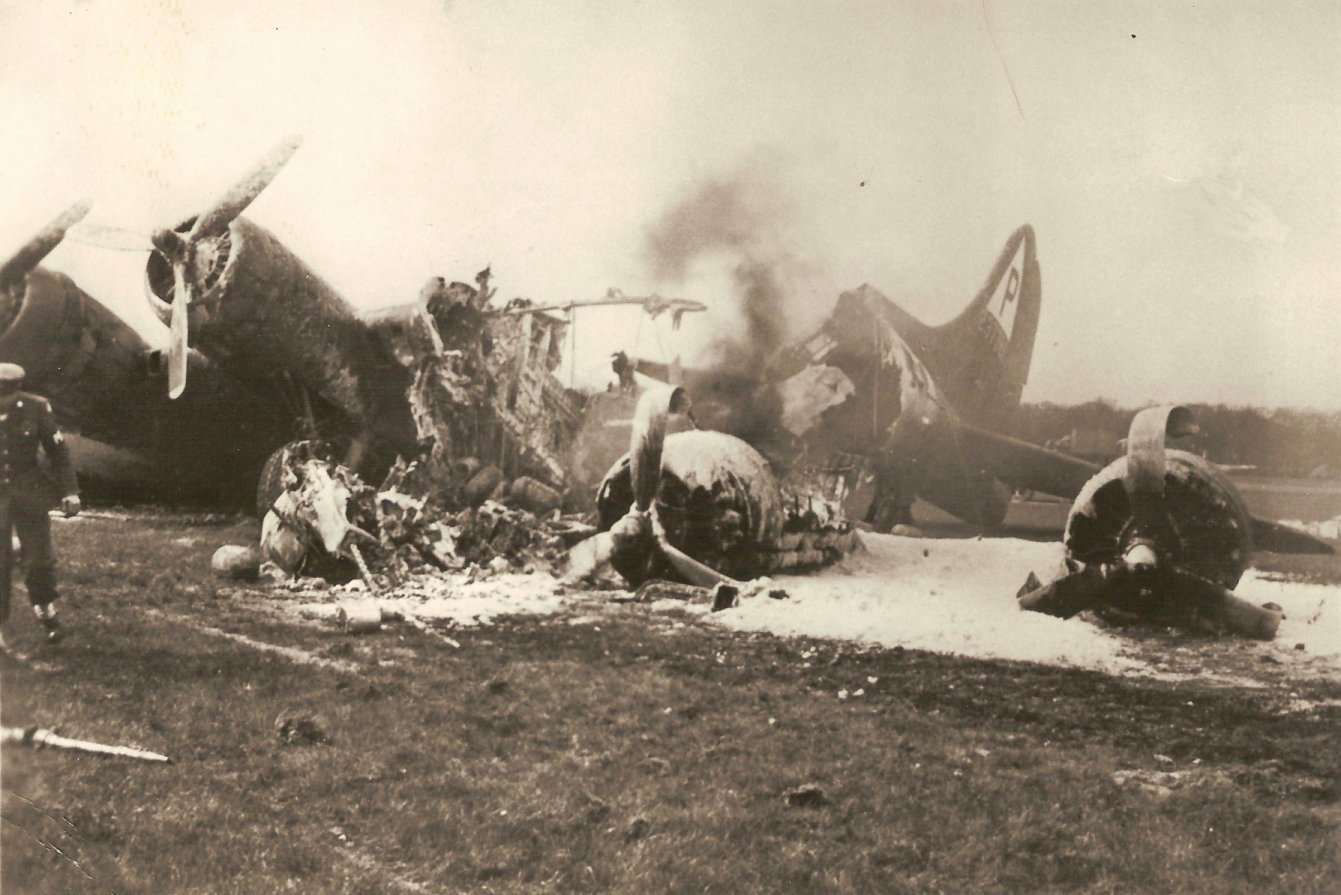
Photo The Quentin Bland Collection, courtesy of www.384thbombgroup.com
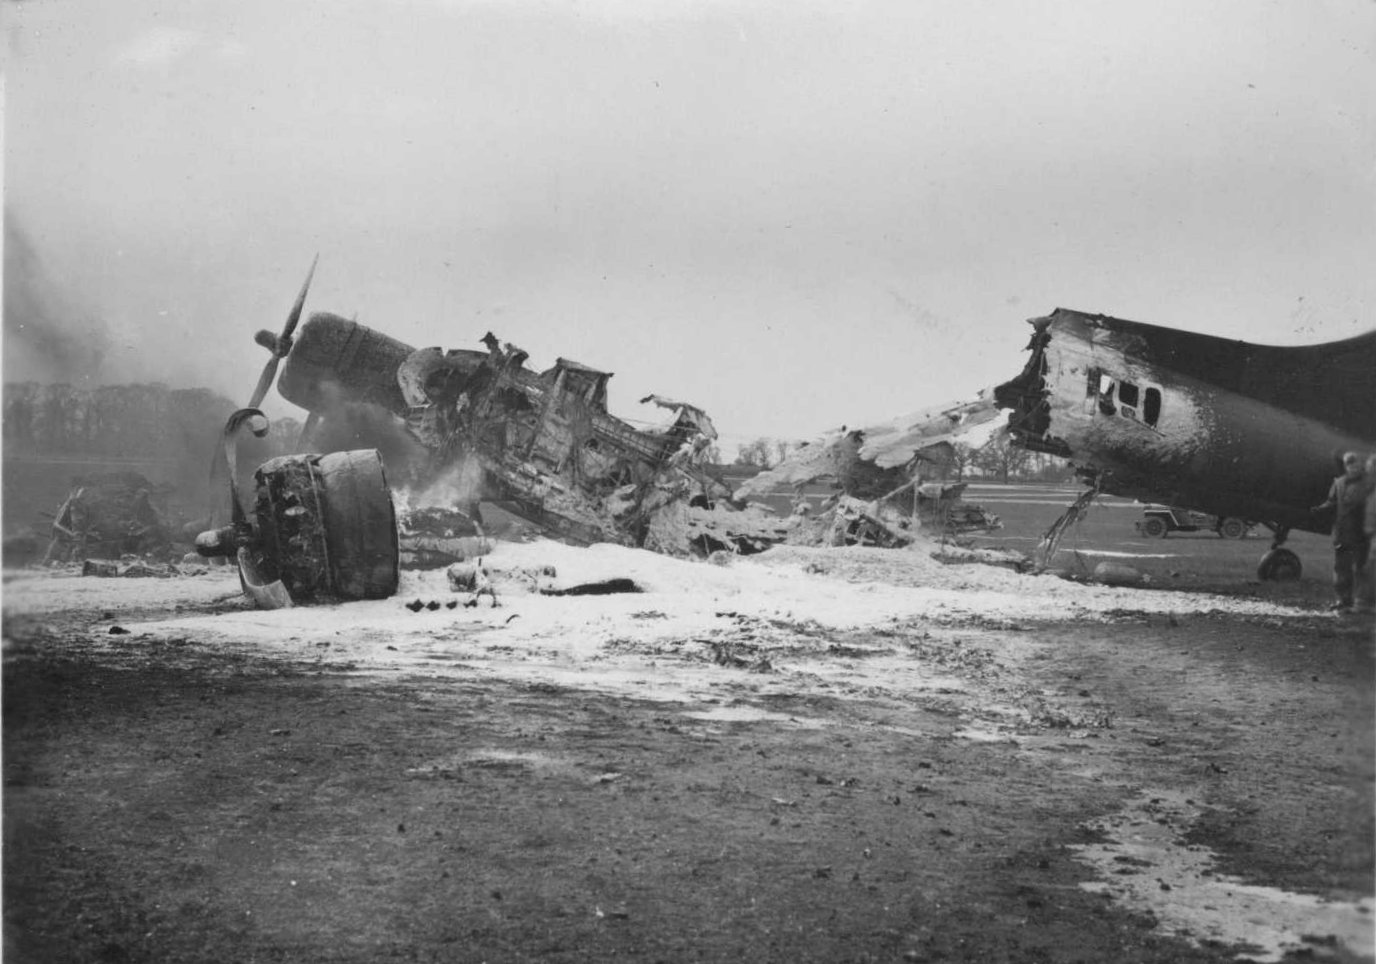
Photo courtesy of www.384thbombgroup.com
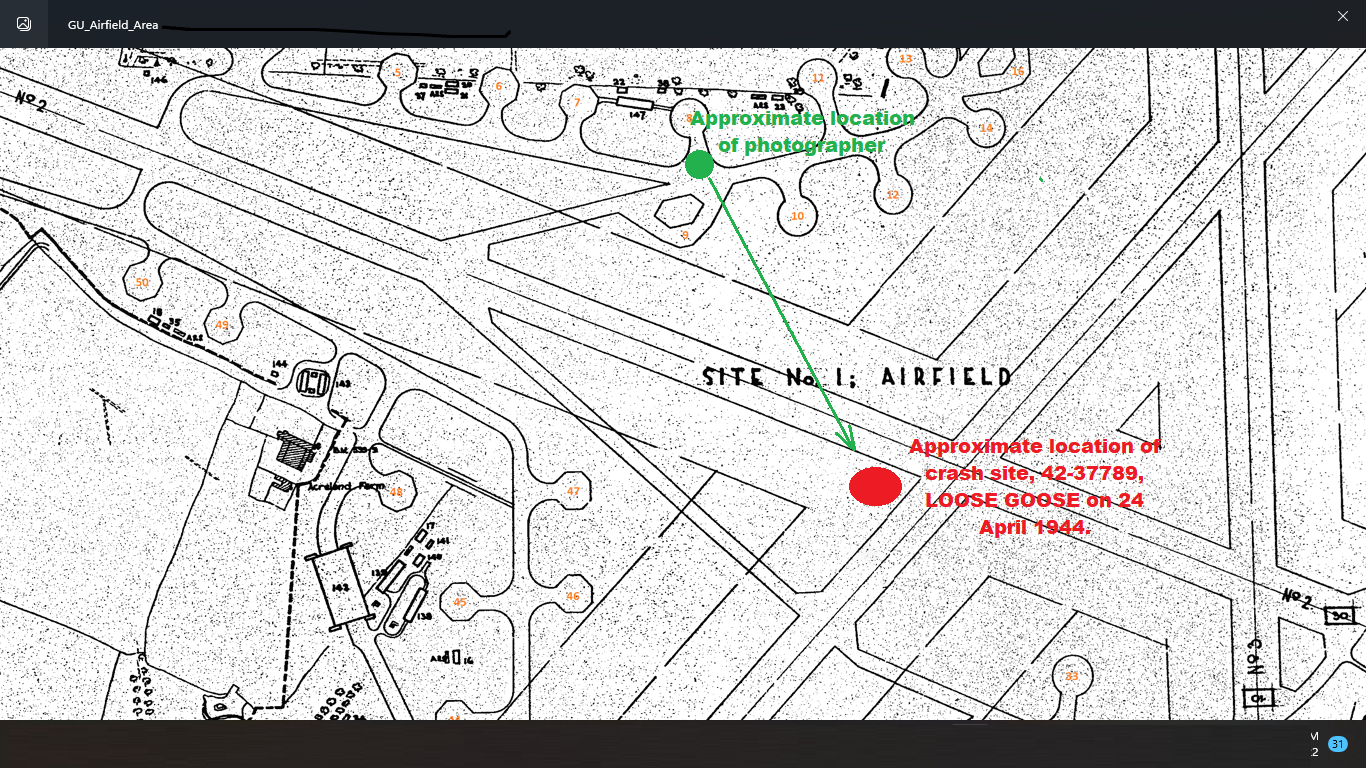
A map of the airfield showing where The Loose Goose likely ended up coming to rest. Image courtesy of www.384thbombgroup.com
The Loose Goose
Last updated: March 17, 2026, 6:38 pm| Name: | The Loose Goose |
| Serial Number: | 42-37789 |
| Manufacturer: | Douglas Aircraft Company |
| Finish: | Camouflage |
| Squadron: | 544th Bomb Squadron |
| Squadron ID: | SU-H |
| Combat Missions Credited: | 9 |
| Fate: | Crash landed, RAF Grafton Underwood |
Delivered at Denver, Colorado on 29th August 1943, #42-37789 was originally assigned to the 303rd Bombardment Group at RAF Molesworth, on 18th September 1943. On 23rd October 1943 the aircraft had been transferred to the BAD (Base Air Depot) at Burtonwood. This was a maintenance and supply depot, used for repairs to aircraft that weren't possible at a Group level. Records show subsequently the 384th Bomb Group received the aircraft from Burtonwood, on the 2nd November 1943, with it being allocated to the 544th Bomb Squadron.
The aircraft was credited with 9 combat missions whilst with the 384th Bomb Group, between 26th November 1943 to 9th April 1944.
On the morning of 24th April 1944, B-17G #42-37789 was scheduled to be part of the 384th Bomb Group's mission #94, to the Dornier-Werke aircraft plant, at Oberpfaffenhofen, Germany. Due to technical difficulties at the last minute, the aircraft was withdrawn from the mission, with a ground spare taking its place.
The aircraft was worked on during the day by technicians, and records show that at 14.00 the aircraft took off from Grafton Underwood, with a crew of four, on a test flight. The crew of four were:-
Pilot Lt. Col. Alfred Charles Nuttall
Co-Pilot 2nd Lt. Alfred Holten Cole
Navigator 2nd Lt. Harold Francis Gantert
Radio operator T/Sgt. Charles Leroy Anderson
Immediately on take off, the crew realised they had a potentially lethal issue - fuel was spotted syphoning out of the #1 engine. The pilot tried rocking the aircraft violently in the hope of fixing the leak, but to no avail. The decision was made to land immediately, with the aircraft seemingly lining up on Runway 2.
At 14.07, the aircraft was on final approach, and sitting around 15 feet above the runway. Possibly through throttling back the engines, the fuel suddenly caught light, causing an explosion that severed the outboard section of the wing from the aircraft.
Although still under control, the aircraft made a very heavy landing, which collapsed the left hand landing gear. This caused the aircraft to veer off to the left of the runway, with the aircraft coming to rest on the grass. A fire had continued to burn on the remaining section of wing, however all the crew were able to immediately, and safely, exit the aircraft.
Images show that emergency vehicles were on the scene quickly, however they were unable to contain the spread of the fire. By the time the blaze had been brought under control, very little remained other than the right wing and the tail section.
Research courtesy of Keith Andrews on behalf of 384th Bombardment Group Museum.
With kind thanks to the 384th Bomb Group website www.384thbombgroup.com for permission in using material from their records in the making of this story. It holds a wealth of information, documents and photographs of their activities during World War 2.
Gallery
#42-37789 The Loose Goose shortly after coming to a stop. Left undercarriage can be seen to have collapsed, as yet the fire has not taken hold. Photo Tony Plowright, courtesy of www.384thbombgroup.com
The first emergency teams have arrived and have started to fight the fire. Photo Tony Plowright, courtesy of www.384thbombgroup.com
In this image the missing section of wing can clearly be seen. Fuel has started to leak feeding an ever increasing fire. Photo courtesy of www.384thbombgroup.com
Ground crew shacks can be seen in the foreground. Photo courtesy of www.384thbombgroup.com
Photo courtesy of www.384thbombgroup.com
Fire has now completely engulfed the wing, with three separate hoses being employed in this image to try and fight the flames. Photo courtesy of www.384thbombgroup.com
Photo Tony Plowright, courtesy of www.384thbombgroup.com
Image taken from Dispersal 13. Photo courtesy of www.384thbombgroup.com
Photo Morgan Himmelstein, courtesy of www.384thbombgroup.com
Aircraft now nearly totally destroyed, with engines #3 & #4 visible pointing upwards, showing the destruction of the fuselage. Photo Tony Plowright, courtesy of www.384thbombgroup.com
Photo courtesy of www.384thbombgroup.com
Fire now extinguished, showing clearly the destruction caused by the fire. Photo Tony Plowright, courtesy of www.384thbombgroup.com
A still taken from a video reel shot at the time of the accident. Photo courtesy of www.384thbombgroup.com
Photo courtesy of www.384thbombgroup.com
Photo courtesy of www.384thbombgroup.com
Photo The Quentin Bland Collection, courtesy of www.384thbombgroup.com
Photo courtesy of www.384thbombgroup.com
A map of the airfield showing where The Loose Goose likely ended up coming to rest. Image courtesy of www.384thbombgroup.com